

I love my garden. LOVE LOVE LOVE my garden. I love working in the dirt and I love making my yard special, and not look like every other house on the block.
SO.. I have a little project to spruce up the garden, a little silly and whimsical, but hey that makes sense for my blog because really what is life with out whimsy?
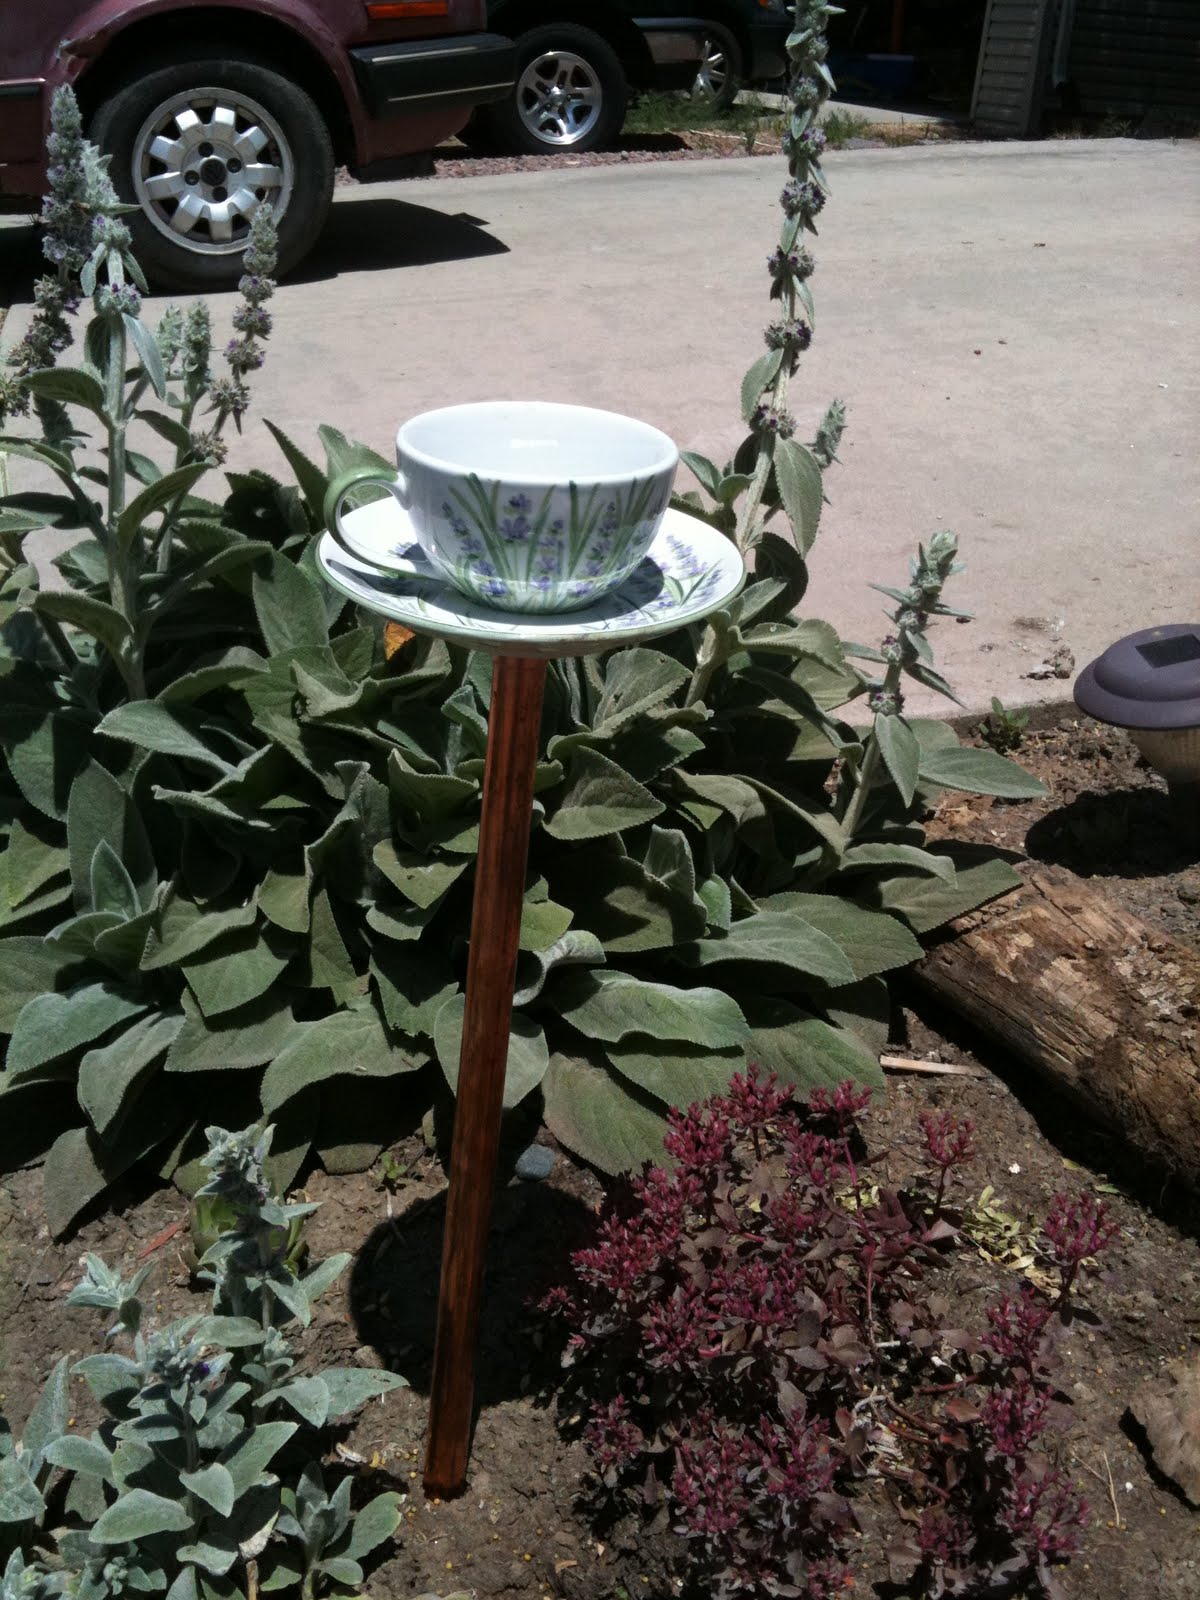
I made a bird bath out of a teacup.. of course it can also be used as a bird feeder, whatever floats your boat! other than the waiting for things to set, this project took about 20 minutes, and even if you have to buy everything it shouldn't cost over $20.00.
What I have for this project:
A teacup and saucer from the goodwill, I picked a largeish one with a painting of lavender on it, lavender is my favorite plant and i would have more of it if it weren't for the winter kill!
A 2 foot piece of 3/4" copper tube )
A 3/4" copper cap.
Epoxy Glue (I have NO idea how much this costs, I always have it around.)

*just a note... the husband won't let me use the epoxy for some reason.. maybe its the accident prone thing that *I* have going on.. but i really think he doesn't want me to go through anything like he did with his bad experiences with mistakes with epoxy. It was not fun for either of us.. chemical burns and all.
What you need to do
1.) Wash up your teacup/ saucer to make sure it is clean for the epoxy. Debris+epoxy= bad or so the husband says.. again he won't let me use it!
2.) SCARY PART ALERT! You need to "rough up" the pretty glaze on the tea cup base and saucer. I used a little square of 80 grit sandpaper and some cheap steel wool soap pads You need to rough it up to expose the porous part so the epoxy adheres better.


3.) Use a liberal amount of epoxy on the base of the teacup and the center of the saucer then put the teacup on the saucer, clean up any that has seeped out.


4.) take the copper pipe and rough it up as well on the top, and rough up the outside of the pipe. I used sand paper, and it works fantastic.


5.) Epoxy the the pipe to the cap, again clean up any that has seeped out. 


6.) Allow the Epoxy to dry and set following the directions on your epoxy.
7.)Epoxy (again!) the pipe and cap to the tea cup... Husband helped me with this and we set up an apparatus to hold everything level and used a Square to make sure it was at the correct angles.


8.) Take your new birdbath out to your garden and poke it into the ground and fill with water or bird seed and enjoy!
*NOTE* to avoid harboring mosquito larvae, bacteria and other unsavory microbes, be sure to clean out the bird bath at least weekly!
COST BREAKDOWN:
Teacup and Saucer from The Goodwill $1.25
Copper pipe (3/4") Free but i saw the same (ish) length for $10.
Copper cap (3/4") 1.01 (I looked at the recipt twice!)
Sandpaper scraps- Leftovers (free)
Epoxy- already had.
Total Cost 12.26
If you like my tutorial please leave me a message!
![]()


So Cute! I'm not sure where I would put this but I want to have it somewhere.
ReplyDeleteI am visiting from the CSI project and have been looking for a tutorial on how to do this. This is just adorable!
ReplyDeleteVery nice. Isn't it great to have hubby help out with an extra pair of hands.
ReplyDeletethanks for stopping by folks and yes it is nice i just wish he would teach me to use epoxy correctly instead of just DOING things for me :-)
ReplyDeleteThis is very cute! All the women in my family love gardening - I think this might just make the perfect gift for our Christmas gift exchange. Love it!
ReplyDeleteI've been wanting to make some of these. They are so cute! Love the tea cup that used!
ReplyDeleteThis is truly a unique project. I love teacups and have quite a few. I think the birds in my yard would like this.
ReplyDeleteThat is so precious! I love it - very unique idea.
ReplyDeleteI saw this on Someday Crafts. It's lovely. I can just imagine little finches fluttering around in it.
ReplyDeleteSuper cute idea... love it!
ReplyDeletevisiting from NFF. i love this idea and may have to make one for myself. thanks so much for sharing!
ReplyDeleteI make these too. But I don't glue the cap to the pipe so I can remove them for washing or for the winter. Come see here http://capcreations.blogspot.com/2010/04/tea-cup-bird-feeder-tutorial.html .
ReplyDeleteThanks for coming by and hi back at ya from nff.
Just stopping by from NFF! I love this idea and can't wait to try it out too!! (Once we get in a house again!)
ReplyDeleteStop on by when you get the chance and enter my giveaway!
www.ourbrokenroad.blogspot.com
Super cute! Thanks for sharing your creativity in the DIY Project Parade!
ReplyDeleteRoeshel